


THE CLIPHAIR BLOG
Trending
-

The Ultimate Hair Extension Length Guide
Abbey WilsonThe Ultimate Hair Extension Length Guide
Abbey Wilson -

The Ultimate Guide to Wedding Hair: Unveiling t...
Heather CollierThe Ultimate Guide to Wedding Hair: Unveiling t...
Heather Collier -

Choose The Right Hair Extensions For Your Lifes...
Heather CollierChoose The Right Hair Extensions For Your Lifes...
Heather Collier -

Buying Hair Extensions: Everything You Need to ...
Heather CollierBuying Hair Extensions: Everything You Need to ...
Heather Collier -

How To Apply Clip In Hair Extensions
Heather CollierHow To Apply Clip In Hair Extensions
Heather Collier -

How Long Do Nano Hair Extensions Last?
Heather CollierHow Long Do Nano Hair Extensions Last?
Heather Collier -

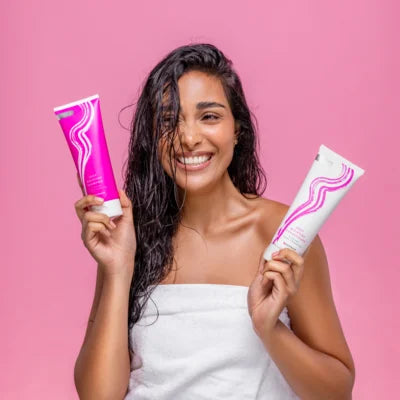
What Shampoo and Conditioner Should I Use With ...
Abbey WilsonWhat Shampoo and Conditioner Should I Use With ...
Abbey Wilson


ALL BLOGS

Taking Care of Extensions: A Simple Guide to Go...
New to extensions? Here’s our simple guide on how to take care of human hair extensions, plus all the products you need to keep your locks looking gorgeous!
Taking Care of Extensions: A Simple Guide to Go...
New to extensions? Here’s our simple guide on how to take care of human hair extensions, plus all the products...

Messy Hair is Back: How to Get Tousled Hair
Find out how to get the ultimate cool girl hair, plus all the ways you can make it look effortless and tousled using our Remy hair extensions.
Messy Hair is Back: How to Get Tousled Hair
Find out how to get the ultimate cool girl hair, plus all the ways you can make it look effortless...

15 Quick and Easy Festive Winter Hairstyles for...
Discover super easy cute winter hairstyles for Christmas! Learn to look fabulous this festive season with our quick and simple hair hacks using clip in extensions.
15 Quick and Easy Festive Winter Hairstyles for...
Discover super easy cute winter hairstyles for Christmas! Learn to look fabulous this festive season with our quick and simple...

The Hottest 70s Hairstyles On Our Pinterest Boa...
In love with the retro aesthetic of 70s hairstyles? I know, me too. Let these iconic looks from the past inspire you for your Spring hair makeover!
The Hottest 70s Hairstyles On Our Pinterest Boa...
In love with the retro aesthetic of 70s hairstyles? I know, me too. Let these iconic looks from the past...

Cliphair's Black Friday Gift Guide
Black Friday is back with a bang! Enjoy up to 30% OFF everything including our premium hair extensions and hydrating haircare. Explore our curated gift guide to find the best...
Cliphair's Black Friday Gift Guide
Black Friday is back with a bang! Enjoy up to 30% OFF everything including our premium hair extensions and hydrating...

10 Easy Hairstyles for Medium Length Hair
Discover 10 easy cute hairstyles for medium length hair with hair extensions, plus all the styling tips you need for gorgeous looking locks.
10 Easy Hairstyles for Medium Length Hair
Discover 10 easy cute hairstyles for medium length hair with hair extensions, plus all the styling tips you need for...

10 Anti Aging Haircuts for Older Women
Explore hairstyles that make you look younger with flattering cuts, soft layers and modern styling tips perfect for confident, stylish older women, all crafted with high quality human hair extensions.
10 Anti Aging Haircuts for Older Women
Explore hairstyles that make you look younger with flattering cuts, soft layers and modern styling tips perfect for confident, stylish...

Your Scent, Your Style: Cliphair's Community P...
Discover how Cliphair’s community came together at Yougi’s immersive perfume-making workshop. Explore the art of scent blending, personal fragrance creation, and the connection between hair, style, and signature scents.
Your Scent, Your Style: Cliphair's Community P...
Discover how Cliphair’s community came together at Yougi’s immersive perfume-making workshop. Explore the art of scent blending, personal fragrance creation,...

Spotted: Natalia Dyer Wearing Cliphair at Stran...
Discover Natalia Dyer’s hottest hair looks on the Stranger Things 5 press tour and unlock how to steal her style wearing Cliphair Remy hair extensions!
Spotted: Natalia Dyer Wearing Cliphair at Stran...
Discover Natalia Dyer’s hottest hair looks on the Stranger Things 5 press tour and unlock how to steal her style...

Ariana Grande Says Goodbye to Glinda and Return...
Ariana Grande has finally ditched her ice blonde hair and returned to her brunette roots! Discover her new shade and how to recreate the look using clip in hair extensions.
Ariana Grande Says Goodbye to Glinda and Return...
Ariana Grande has finally ditched her ice blonde hair and returned to her brunette roots! Discover her new shade and...

How to Dry Hair Extensions Like a Pro
Learn how to dry hair extensions like a pro! From air drying clip ins with an extension holder to blow drying nano rings and weaves safely, here’s how to keep...
How to Dry Hair Extensions Like a Pro
Learn how to dry hair extensions like a pro! From air drying clip ins with an extension holder to blow...

How to Get a High Contrast Hair Look with Hair ...
Discover how to achieve beautiful high contrast hair colours with human hair extensions, from 90s chunky highlights to bold split dye hair looks. Learn styling tips, colour inspiration, and what...
How to Get a High Contrast Hair Look with Hair ...
Discover how to achieve beautiful high contrast hair colours with human hair extensions, from 90s chunky highlights to bold split...

Ethically
Sourced
Outstanding
Reviews
Cliphair
Rewards
Free Delivery
& Returns
Buy Now
Pay Later


