


Article Read Time - 2 Mins
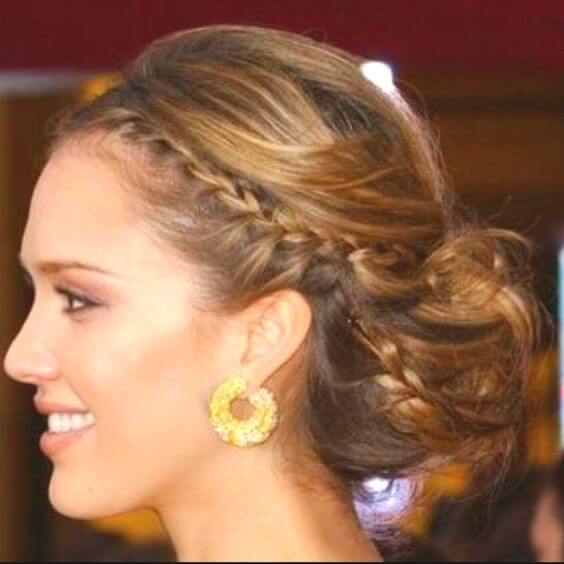
How To Hairstyle: The messy braid bun
Table of Contents
While neatly braided buns haven’t been in since 2007 messy braid buns are all the rage. Whether you are going to a wedding or chilling on a Mediterranean island, this style will have people saying “that looks great, how did you do it?”. This style has been a hit on the red carpet already this year and is set to be worn by celebrities and us mere mortals all year long. The best thing is it works wonderfully on second day hair and looks far harder than it actually is. The dutch braids make it look full and interwoven so the hard work is done for you!

Prep and part
This look is not about subtlety. The aim is to make a statement and look fabulous so create a deep part on your right side and let’s get started. For extra thick, luscious break out your extensions and place the around your crown and temples for extra glam! This look on its own in so in right now but it is also great preparation for this stylish do.
Dutch it up
Select a 2 inch section from your heavy side of the parting to start your braid. Be careful to leave a few strands free at the hairline so it so has the easy- going beauty affect. Divide your 2 inch section into 3 and cross the back strand around and under the middle strand to start your dutch braid. Continue by crossing the front strand around and under the middle. Repeat crossing the back strand under the middle and include extra strands from the side. This is how your braid will look beautifully interwoven and stay secure. Continue your braid by crossing each section under the other and adding extra strands so that your dutch brain travels backwards. If you have a fringe try to incorporate this within the first 6-7 crosses.

Switch braids and repeat
Once the length of your dutch braid reaches just behind your ear we need to switch tactics. Instead of incorporating extra strands simply continue braiding the hair down in a regular dutch braid and secure it at the end with a clear hair tie. Once we have this braid beautifully finished we need to create another dutch braid on the other side of the head with the same steps and secure it with a clear hair tie at the end.

Mess up that bun
Once both of your gorgeous dutch braids are finished gather all of your hair into a low ponytail and loosely secure with a clear hair tie. Gently fold your hair upwards and pull it halfway through the band. This is the rough shape of your messy bun but remember to pin it in place so it doesn’t fall out. loosen your braids so that they are not too tight in the bun and tug on each section of your braid to make it more voluminous. Once you are all pinned in place add a flower or jewelled clip for extra decoration and add your alcohol free hairspray so you can rock this look from day to night.
The post How To Hairstyle: The messy braid bun appeared first on Hair Extensions News.

EXTENSIONS BIBLE
HAIR CARE & TIPS

OUR TOP TRENDS

STYLING GUIDES & TUTORIALS

WEDDING & OCCASION HAIR

LIFESTYLE & POP CULTURE

10 Quick and Easy Summer Hairstyles with Clip-I...
10 Quick and Easy Summer Hairstyles with Clip-I...

How to Do Victory Rolls: A Step-by-Step 1940s H...
How to Do Victory Rolls: A Step-by-Step 1940s H...

Cute World Cup Hairstyles You Can Create with H...
Cute World Cup Hairstyles You Can Create with H...


