


Article Read Time - 5 Mins
How To Style a Clip In Fringe
Table of Contents
The fringe, aka bangs, aka… That one tempting haircut that we all considered at least once in our lives. But then again, the opinions are mixed… Some say that a fringe is quite hard to grow out, others simply start styling it in a set of trendy curtain bangs and let it do its thing until the hair is long enough to be styled as face-framing layers. But then again, what if you’d like to experiment with different types of fringes and bangs without any commitment? Before hair extensions took over, switching looks and bangs hairstyles from one day to another seemed like an unachievable dream. But today, the story is quite different: look no further than a clip in fringe! This versatile accessory is the perfect solution for those who would like to try something new every day, and can be popped on and off for any occasion. But how do you style your clip in bangs, and how many different looks can you achieve with yours? Let’s find out together..
Choosing the Right Clip in Fringe
First things first, you need the right type of clip in fringe. Of course, just like the rest of our hair extensions collection, Cliphair’s clip in bangs are made of 100% Remy human hair. Only the best quality for flawless and natural results! Our bangs come in a standard length of 10” so that you can style them however you prefer, and experiment with many different styles. Let’s have a look at some stats:
Number of Clips: 3 – one at the centre, two on the sides, for secure and sturdy attachment. Just like the rest of Cliphair hair extensions, the clips are silicone-lined for a gentle application that won’t damage your natural hair.
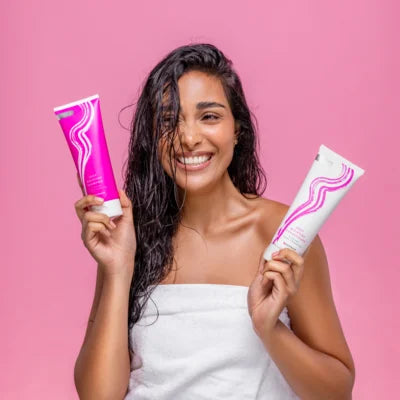
Lifetime: 6-12 months, with the right aftercare. Make sure you only use the right shampoo and conditioner for when it’s time to get your clip in fringe washed! Our collection Quench The Thirst is specifically designed to clean Remy human hair extensions and natural hair in a gentle, 100% sulphate-free and paraben-free way. Enriched with ingredients such as Baobab seed oil, rice proteins, coconut oil, and honey, the line – inclusive of shampoo, conditioner, and a hair mask – takes care of your tresses under the shower, replenishing moisture levels and enhancing shine and softness.
Colour: the clip in fringe is available in 20+ shades, including mixed and funky colours. Explore the collection and find your perfect match, or use our Colour Matching service – where an expert from our team will help you find the right shade for you, completely free of charge.
Length: 10 Inches, with longer side pieces to frame your face and seamlessly blend in with your natural hair.
Application Time: 2min… Or even less, if you’re particularly skilled!
Total Width: 6” for a natural, realistic finish!
Weight: 30g
Number of Wefts: 1 – just the right amount of thickness for a blunt set of bangs that can be styled to your preference.
Hair Type: 100% Remy human hair.
Hair Pattern: Straight.
Blending Techniques for Seamless Integration with Extensions
If you’ve already purchased the perfect clip in fringe for you, then it’s now time to get styling. Unless you’ve already experimented with bangs in your life, it’s best to leave this to a qualified hair stylist. Blending in with your natural hair can be done in just a few minutes, depending on the style that you want to achieve with your new clip in bangs. To complete this task, if you’re willing to try it on your own, you’ll need thinning scissors, hair cutting scissors, sectioning clips (also known as alligator clips), and a pintail comb. Whilst some of these tools are available in the Cliphair Hair Accessories collection, for some others – such as professional scissors – you might need to refer to hair salons and professional retailers. You can find some of our recommendations in this blog: The Best Scissors To Trim Hair Extensions At Home.
Trimming and Customising Your Clip in Fringe with Extensions
Depending on the desired style, you can trim and customise your clip in fringe however you prefer. Be mindful that every cut is permanent, so make sure you first try it on and take the necessary measurements. Straightening your bangs with a flat iron can also help you get the numbers more accurately. Check out our dedicated blog: How To Cut Hair Extensions to know more about cutting your own hair extensions. Ready to find your style? Here’s some of the hairstyles you can achieve with a set of Cliphair clip on bangs.
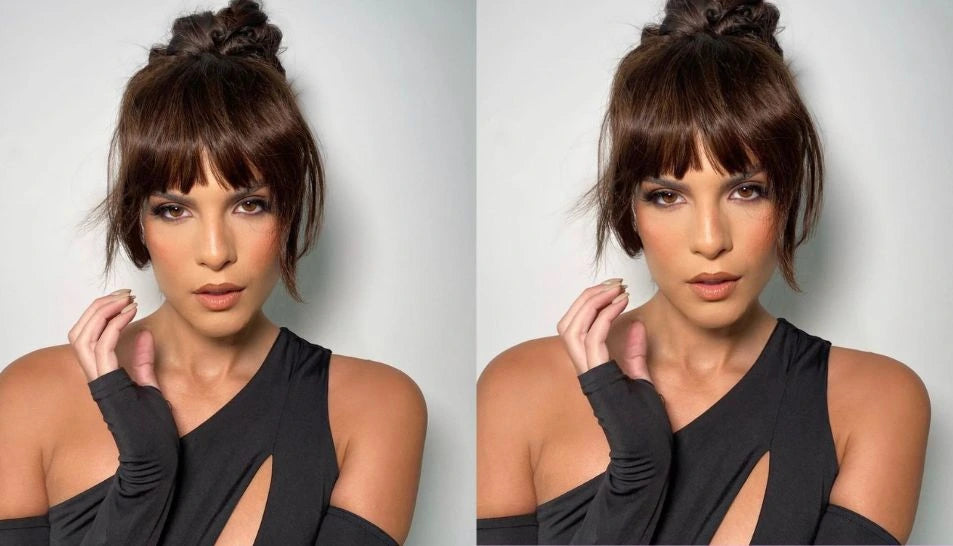
Blunt Fringe
Probably the easiest hairstyle to achieve, the blunt bangs are the perfect finish for a long and sleek hairdo. Elegant and sophisticated, this look has been spotted on celebrities such as Lady Gaga, Taylor Swift, and Liv Tyler. Characterised by a heavy, full line and a straight cut, blunt bangs work wonders on oblong, round, and oval faces.
Wispy Bangs
Wispy bangs are a fan favourite for those that love the blunt style but don’t find it as flattering on their own features, and are particularly indicated for those who have been blessed with a squared or heart-shaped face. As seen on Zendaya, Bella Hadid, and Hailey Bieber, wispy bangs are a trendy and youthful hairstyle.
Baby Bangs
Also known as micro bangs, this haircut has been on the rise especially when fashion trends tend to go more on the edgy side of things. Sported by celebs such as Alexa Demie, Olivia Rodrigo, and Emma Watson, this trend is on the rise and is considered a power move. Definitely for the bold type, and working wonders on oval faces!
Choppy Bangs
The stunning hairdo as seen on Gigi Hadid, choppy bangs can seem quite intimidating at first, but can be just the cherry on top of an undone, lived-in hairstyle that is glamorously curated. Perfect for heart-shaped and diamond-shaped faces that want to bring attention to their big eyes and cheekbone area!
Curtain Bangs
The trend that has been adopted by thousands of millennials and gen Z alike thanks to the 90s revival. Stars of the time such as Cindy Crawford, Madchen Amick, and Denise Richards have all walked so that the curtain bangs-wearers of today could run. The perfect hairstyle for those who would like to add face-framing layers to their faces without committing to a dramatic fringe change. Working wonders on round faces!
Conclusion:
Congratulations! If you did everything right, you have now mastered the art of styling and wearing your own bangs. Get yourself a fresh set of hair extensions to create your favourite looks, and don’t forget to explore our Hair Care collection and Hair Accessories range to get all of your styling and aftercare essentials, so that your hair extensions can live the happiest, healthiest, and longest life!

EXTENSIONS BIBLE
HAIR CARE & TIPS

OUR TOP TRENDS

STYLING GUIDES & TUTORIALS

WEDDING & OCCASION HAIR

LIFESTYLE & POP CULTURE
Latest Articles

Taking Care of Extensions: A Simple Guide to Go...
Taking Care of Extensions: A Simple Guide to Go...

Messy Hair is Back: How to Get Tousled Hair
Messy Hair is Back: How to Get Tousled Hair

15 Quick and Easy Festive Winter Hairstyles for...
15 Quick and Easy Festive Winter Hairstyles for...


