You’ve just washed your hair extensions, and now they’re hanging there, dripping, heavy, and looking more like a soggy mop than the gorgeous locks you had yesterday. You might be tempted to blast them with the hairdryer on full power or just toss them on the airer and hope for the best, but drying your hair extensions the wrong way can lead to tangles, brittle ends, and even damage. So, how do you dry hair extensions like a pro, without sacrificing shine, softness, or your sanity?
Whether you’ve got yourself some clip-in hair extensions or you’re more of a permanent hair extensions fan, this guide will take you step by step through the best ways to dry them safely, quickly, and with maximum beauty.
Can You Leave Hair Extensions to Dry Naturally?
Let’s tackle the big question first: Can you leave hair extensions to dry naturally? The short answer is yes, you can, but there’s a method to the madness. If you’re working with clip in extensions, air drying them is actually the best option! Since you don’t wear them 24/7, you can take your time and let them air dry flat on a towel or on a holder designed specifically for hair extensions. This helps them maintain their smooth texture and prevents any heat damage.
However, if you’ve got permanent hair extensions like tape-ins, nano rings or weaves, things are a little different. Leaving them damp for too long can weaken the bonds or adhesive, and damp roots and extensions can create a potential disaster. Instead, it’s best to follow up with a controlled blow-dry on a low heat setting.
All of our extensions are made with 100% Remy human hair, meaning they dry with a natural texture. If you want silky, straight hair again after air-drying, simply apply some heat protection spray and go over them gently with straighteners before styling to your liking. If you’re struggling with taming fly-aways, apply a generous amount of silky spray once you’ve finished styling to keep any stray strands in place.
Tip: Never go to bed with wet extensions! Not only will you wake up with a tangled bird’s nest, but you’ll also risk damaging the bonds and shortening their lifespan.
The Cliphair Must-Haves for Easy Drying
Drying your extensions doesn’t have to be a juggling act, not when you’ve got the right tools!
Cliphair Hair Extension Holder: Keeps your clip-ins or wefts secure while drying or styling. Perfect for air drying, blow-drying, brushing, or curling hands-free.
Cliphair Hair Extension Hanger: Hang your extensions vertically for even airflow and minimal tangling. Ideal for drying clip-in hair extensions naturally or prepping them for styling.
Use them together for salon-level results at home. Your hair (and your bathroom countertop) will be very grateful!
Step-by-Step: How to Dry Hair Extensions the Right Way
Drying your extensions with a blow-dryer doesn’t need to feel like a mission. Follow these easy steps on how to dry clip in hair extensions:
1. Start with the Right Prep
Before drying, gently blot your extensions with a towel to soak up excess moisture. Don’t rub or create too much friction, as that’s an instant frizz invitation. If you’re drying clip in extensions, always remove them before washing and lay them flat on a clean towel.
2. Use a Heat Protectant
Before blow-drying, spritz a heat protectant spray through the mid-lengths and ends. This prevents the heat from stripping away moisture and shine. If your locks are in need of extra nourishment, apply a lightweight leave-in conditioner to the same areas for a glossier look and feel.
For clip ins, air drying is the most gentle and natural way to go. After blotting them dry, lay them out on a towel in their natural shape. You can also hang them on a hanger or holder for better airflow.
Make sure they’re in a well-ventilated space, not in direct sunlight or near a heater. Mother Nature knows what she’s doing.
4. Detangle
To finish, gently comb them with a wide-tooth comb or detangling hair brush while they’re still damp to prevent matting and knots.
For permanent hair extensions, the drying game is all about protection and patience.
1. Focus on the Roots
Your roots and the bonds where your professional hair extensions attach need to be dried first. This prevents moisture from sitting too long, which could cause slippage or damage. Use a blow dryer on a low heat setting, directing the airflow downward.
2. Work in Sections
Divide your hair into manageable sections. Dry each section from root to tip, making sure to hold your hair as you go. This helps keep them smooth and tangle-free.
3. Cool It Down
Finish off with a blast of cool air to lock in shine. It’s like pressing “save” on your perfect blow-dry.
Can You Leave a Weave to Dry Naturally?
Weaves are sewn into braids, which means airflow can struggle to reach your scalp and roots. Here’s how to do it right:
Use a towel to blot out extra moisture.
Aim your dryer at the roots first on a low heat setting. Focus on the braided area to make sure it’s completely dry.
Use a diffuser or your fingers to gently lift sections, allowing the air to circulate.
Once the base is dry, move to the mid-lengths and ends.
Tip: Like all permanent extensions, you shouldn’t let weaves air dry completely, especially near the scalp. Damp braids can lead to a build-up of bacteria or odour – not the kind of “natural fragrance” anyone wants!
How to Dry Nano Ring Hair Extensions
Nano rings are one of the most discreet and delicate types of permanent hair extensions, so drying them gently is key.
Gently towel-dry first and avoid tugging near the rings.
Start your blow-dry by focusing on the roots and nano rings. Use a medium setting and direct airflow downwards.
Hold your dryer about 6 inches away to avoid overheating the attachments.
Once the roots are dry, move on to the lengths.
Tip: Nano rings love a good smoothing session with a detangling brush while drying, it keeps everything sleek and in line.
Conclusion:
From damp and distressed to diva in minutes! Drying hair extensions doesn’t have to be a chore. With the right care, a few professional tricks, and the magic of our hair extension hanger, holder and other handy accessories, you can keep your clip in or permanent extensions looking flawless for a whole lot longer. So whether you’re wearing nano rings, weaves, or classic set of clip-in hair extensions, remember gentle heat, patience, and a little Cliphair love goes a long way.
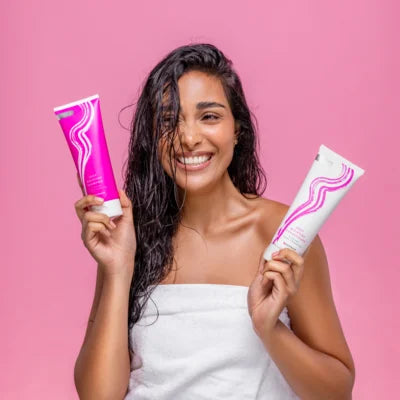
Looking for flawless, salon-worthy hair without breaking the bank? At Cliphair, we’ve got you covered with luxurious clip in hair extensions for quick transformations and permanent hair extensions for long-lasting glam. Extensions require special care and maintenance to preserve their quality, which is why we have all the top-notch hydrating haircare products needed to keep your style on point.
Need the perfect shade? Browse our full range of human hair extensions in over 70 rich, silky shades or check out our FREE Express Colour Match Service to ensure a seamless blend every time.