
Your Cart is empty


We are literally just four days away from the premiere of Frozen 2 in cinemas *insert excited screaming*. We’ve only waited six years for this (not that we were counting or anything). The ice queen and her adorable sister won the hearts of girls and women worldwide back in 2013, and admittedly, we’ve been copying and recreating Elsa's Hairstyle: the Elsa braid ever since.
While we can only judge from the trailer, we know that Disney has changed up Anna's and Elsa's hairstyles in Frozen 2. There are some new Frozen-inspired hairstyles in the movie that we will all be trying until the next sequel (Anna’s new do being a personal favourite). Here are our top favourite hairstyles from the Frozen 2 trailer – and how to get them (cosplayers rejoice).
Anna’s Half-Up-Do
In Frozen 2, Anna’s look has changed – her signature two French plaits have been swapped for a more mature half-up half-down hairdo. The look is completed with two smaller braids pulling back her hair that frames her face. Anna is a confident and admirable young woman, and her new-do is fierce and shows just that.
To get this look, make sure you have waves in your hair. Use hair extensions, tongs or wet and braid your hair the night before for a heat free method.
- Take a small section of your hair from just above your ear from both sides and braid each section to the end. If you have thin hair, stretch the braided hair for it to appear thicker.
- Now take one braid from either side and follow the curve of the crown at the back of your head to the other end and pin it in place.
- Take the other braid, follow the same curve and pin it in place on the opposite side.
- Adjust the hair above the braid to complete the look.
Use our Wrap Around Ponytail to get the perfect updo!
New Loose Elsa Hairstyle
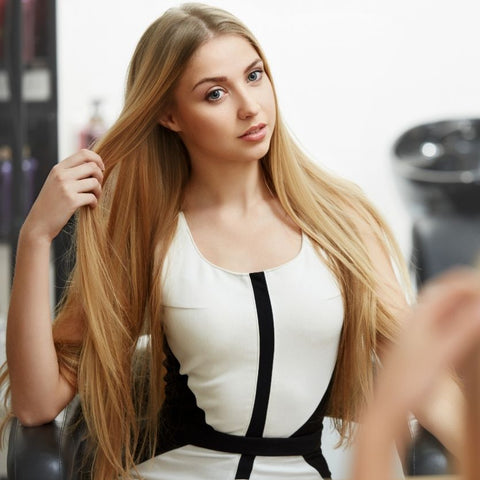
Queen Elsa also has a new do – her white-blonde hair is tied back, with the tail falling loosely down her back, for a pretty, but glam, laid-back style. She uses her own hair to secure the loose low ponytail, leaving just a few tresses to frame her face. The Elsa hairstyle is chic yet practical. Channel ice cool glamour with this style.
- First, put all your hair back into a ponytail at the bottom of your face, leaving a few strands at the front.
- Use a flat hair tie to secure your ponytail so your hair doesn’t bulge.
- Take about half an inch of your hair from the ponytail to wrap around the base of your ponytail.
- Wrap the hair around the base of your ponytail until you’ve reached the ends, making sure all hair is neatly wrapped around or hidden under your ponytail.
- Now use a bobby pin to hold the hair, and voila! Your Frozen 2 Elsa hairstyle is ready.
Elsa’s Signature Braid
Yes, we said new, but is it really Frozen without a signature Elsa Hairstyle? If there’s any image that conjures up Frozen immediately, it’s Elsa’s voluminous French braid. The style is not only perfect for a chic everyday hairstyle, but it can also be an alternative to traditional glam up-dos. Check out our tutorial on how to achieve this look with Cliphair’s ponytail extensions.
How to Create Elsa from Frozen's Signature Braid
We are only weeks away from Halloween, one of the biggest inspirations is always Frozen. The Disney queen and princess have won the hearts of girls worldwide. Fun fact: did you know that the location of the film was inspired by Norway? If Arrendale were real, it would probably be based there. Today I want to show you how to create an amazing braid that will be perfect for your blue gown.

Step 1: Prepare Your Hair
I am going to assume that you are creating this look on your own hair and not a wig that comes with the costume (they never look good). The way to make your Elsa Hairstyle really pop is to use your own hair, or get some help from Remy human hair extensions. This style calls for extra thick locks so feel free to pop in a full set of your Cliphair extensions.
Step 2: Add Your Crowning Volume
You may or may not want to wear a crown as part of your Elsa Hairstyle. Either way, you need to make your crown look fit for a queen. In this case, the way to do that is to add some volume. Add some hairspray to your roots at your crown. Grab a comb and tease your roots. Repeat this all-around your crown section, make sure you smooth it over.

Step number 3: Create your braid
This is a pretty classic three-strand French braid so even if you are fairly new to braids, you should cope with this one fine. You want to start at your crown so you retain volume at your roots. To make sure your braid is thick add a strand of hair from either side of your braid as you go along. You will probably have your hair over one shoulder for most of the night so you will need to angle your braid to help you with this. Start at your nape and bring your hair over one shoulder before you continue with your three-strand braid.
Use a clear hair tie to tie off the fishtail braid. Use a fishtail comb to lift your roots at your crown. To finish your Elsa Hairstyle gently tug on the sections of your braid to pancake them to make them lovely and full. If you have enough hair at the ends wrap them around the hair tie.
For even more Elsa hairstyle (Frozen Hairstyling) guidance check our full plated ponytail guide.
You may also like:
-
Colour Matching: How to Choose the Right Colour of Hair Extensions
- Do Hair Extensions Damage Your Hair?
-
Hair Extension Buying Guide & Hair Glossary
- Everything You Need to Know About Tape In Extensions
- Tape In Hair Extension Care Guide


POST COMMENTS
Leave a comment